Rodin Handbook
This work is sponsored by the Deploy Project
This work is licensed under a Creative Commons Attribution 3.0 Unported License
| User Manual for Rodin v.2.3 |
3.1.4 The Event-B Editor
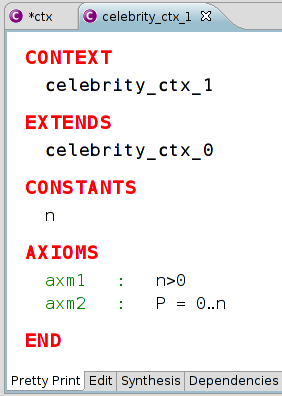
Once a context or a machine is created, a window appears in the editing area as shown in figure 3.9.
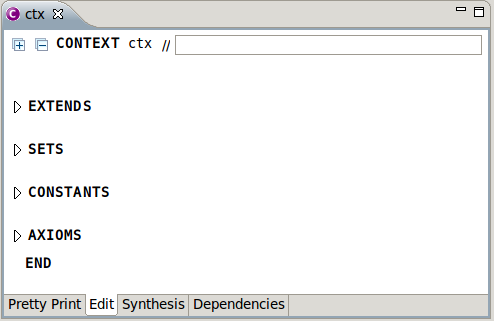
By default, you are in the Edit mode which allows you to edit the modelling elements of the context which are the dependencies (keyword "EXTENDS"), the carrier sets (keyword "SETS"), the constants (keyword "CONSTANTS"), and the axioms (keyword "AXIOMS"). By pressing the triangle (
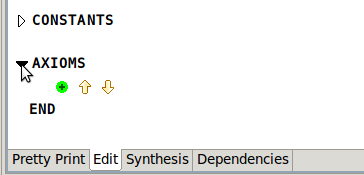
![\includegraphics[height=2ex]{img/icons/rodin/collapsed.png}](images/img-0017.png) ) next to each keyword, you can see the different modelling elements and also add, remove, or move them. Figure 3.10 shows what the section looks like after pressing the triangle next to the keyword "AXIOMS".
) next to each keyword, you can see the different modelling elements and also add, remove, or move them. Figure 3.10 shows what the section looks like after pressing the triangle next to the keyword "AXIOMS".
By pressing the
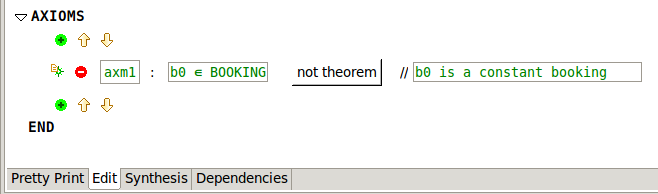
![\includegraphics[height=2ex]{img/icons/rodin/add.png}](images/img-0019.png) button, you can add a new modelling element. For instance, clicking on the
button next in the AXIOMS section will add a new axiom element. You can now enter a new axiom and a comment in the corresponding boxes as indicated in Figure 3.11.
button, you can add a new modelling element. For instance, clicking on the
button next in the AXIOMS section will add a new axiom element. You can now enter a new axiom and a comment in the corresponding boxes as indicated in Figure 3.11.
To remove a modelling element, press the
![\includegraphics[height=2ex]{img/icons/rodin/remove.png}](images/img-0396.png) button. You can also move an modelling element up or down by selecting it and then pressing one of the two arrows (
button. You can also move an modelling element up or down by selecting it and then pressing one of the two arrows (
![\includegraphics[height=2ex]{img/icons/rodin/up_edit.png}](images/img-0397.png) or
or
![\includegraphics[height=2ex]{img/icons/rodin/down_edit.png}](images/img-0398.png) ).
).
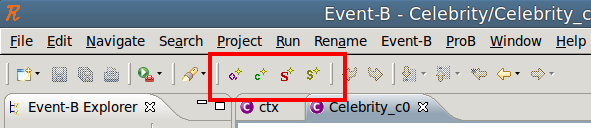
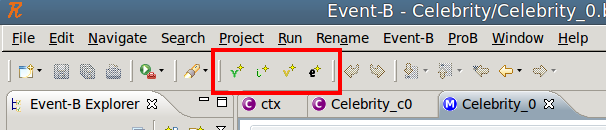
It is also possible to add modelling elements by using wizards. You can active the different wizard by using the buttons in the tool bar as shown in Figure 3.12 and in Figure 3.13 or via the Event-B menu (keeping in mind that the wizards depend on the active file machine or context). The next sections explain how to use the wizards.
3.1.4.1 New Carrier Sets Wizard
To activate the New Carrier Sets Wizard, press the
![\includegraphics[height=2ex]{img/icons/rodin/newset_edit.png}](images/img-0401.png) button located in the tool bar. Pressing the button bring up the window shown in Figure 3.14.
button located in the tool bar. Pressing the button bring up the window shown in Figure 3.14.
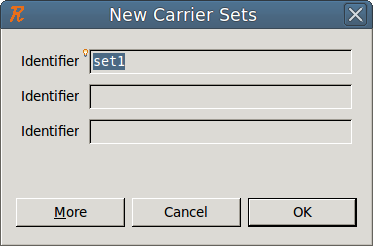
You can enter as many carrier sets as you want by pressing the More button. When you are finished, press the OK button.
3.1.4.2 New Enumerated Set Wizard
To activate the New Enumerated Set Wizard, press the
![\includegraphics[height=2ex]{img/icons/rodin/newenuset_edit.png}](images/img-0403.png) button located in the tool bar. Pressing the button bring up the window shown in Figure 3.15.
button located in the tool bar. Pressing the button bring up the window shown in Figure 3.15.
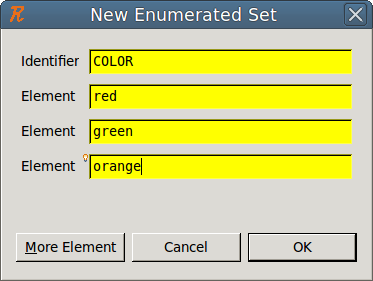
Enter the name of the new enumerated set as well as the names of its elements. By pressing the More Elements button, you can enter additional elements. When you’re finished, press the OK button. The benefit of using this wizard is that in addition to creating the set and its elements, the wizard automatically creates the axiom that is necessary for the context to work. For example, when you add the new carrier set COLOUR and the three constants red, green, and orange, the wizard automatically creates the following axiom  .
.
3.1.4.3 New Constants Wizard
To activate the New Constants Wizard, press the
![\includegraphics[height=2ex]{img/icons/rodin/newcst_edit.png}](images/img-0406.png) button located in the tool bar. Pressing the button will bring up the window shown in Figure 3.16.
button located in the tool bar. Pressing the button will bring up the window shown in Figure 3.16.
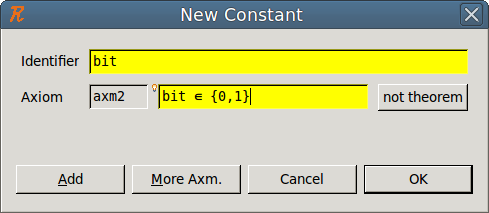
You can then enter the names of a constant and an axiom which can be used to define the constant’s type. By pressing the More Axm. button you can enter additional axioms. To add more constants, press the Add button. When you have finished, press the OK button.
3.1.4.4 New Axioms Wizard
To activate the New Axioms Wizard, press the
![\includegraphics[height=2ex]{img/icons/rodin/newaxm_edit.png}](images/img-0408.png) button located in the tool bar. Pressing the button brings up the window shown in Figure 3.17.
button located in the tool bar. Pressing the button brings up the window shown in Figure 3.17.
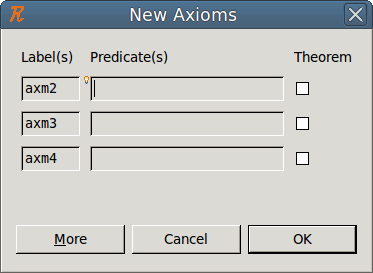
You can then enter the axioms you want. If more axioms are needed, press the More button. When you are finished, press the OK button.
Check the “Theorem" checkbox to indicate that the corresponding axiom should be a theorem.
3.1.4.5 New Variable Wizard
To activate the New Variable Wizard, press the
![\includegraphics[height=2ex]{img/icons/rodin/newvar_edit.png}](images/img-0410.png) button located in the tool bar. Pressing the button brings up the window shown in Figure 3.18.
button located in the tool bar. Pressing the button brings up the window shown in Figure 3.18.
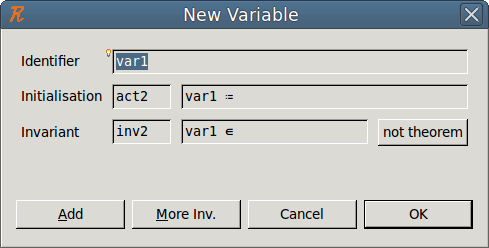
You can then enter the names of the variable, what its state at initialization should be, and an invariant which defines its type. By pressing button More Inv., you can enter additional invariants. For adding more variables, press the Add button. When you’re finished, press the OK button.
3.1.4.6 New Invariants Wizard
To activate the New Invariants Wizard, press the
![\includegraphics[height=2ex]{img/icons/rodin/newinv_edit.png}](images/img-0412.png) button located in the tool bar. Pressing the button bring up the window shown in Figure 3.19.
button located in the tool bar. Pressing the button bring up the window shown in Figure 3.19.
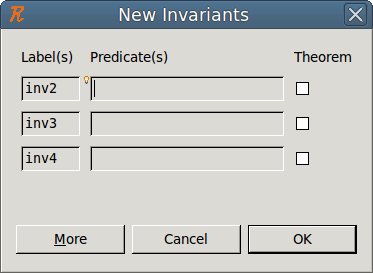
You can then enter the invariants you want. If more invariants are needed, press the More button. Check the Theorem checkbox to indicate that the corresponding invariant should be a theorem.
3.1.4.7 New Event Wizard
To activate the New Events Wizard, press the
![\includegraphics[height=2ex]{img/icons/rodin/newevt_edit.png}](images/img-0414.png) button located in the tool bar. Pressing this button brings up the window shown in Figure 3.20.
button located in the tool bar. Pressing this button brings up the window shown in Figure 3.20.
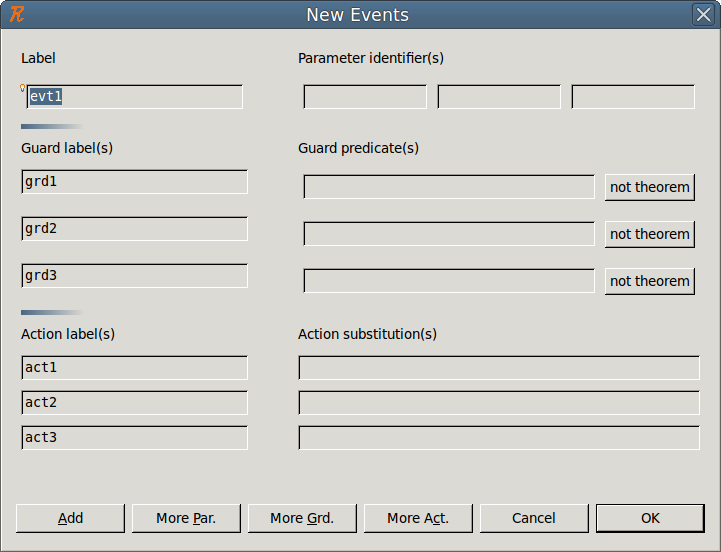
You can then enter the events that you want. As indicated, the following elements can be entered: name, parameters, guards, and actions. More parameters, guards and actions can be entered by pressing the corresponding buttons. If more events are needed, press the Add button. Press the OK button when you’re finished.
Note that an event with no guard is considered to the guard  . Also, an event with no action is considered to have the action
  .
.
3.1.4.8 Dependencies (Context)
By selecting the Dependencies tab at the bottom of the Event-B editor, you obtain the window as shown in Figure 3.21.
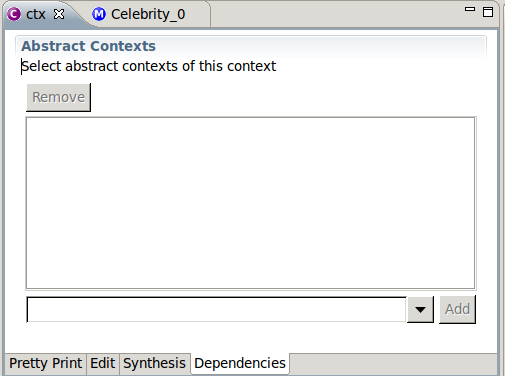
The dependencies tab allows you to control what other contexts that the current context is extending. To add the context that you want to extend, select the name of the context from the drop-down menu at the bottom of the window and then hit the Add button.
There is also another way to create a new context as an extension existing one. Select the context in the project window and then press the right mouse key. Then select Extend from the menu that opens up. This should bring up the window as shown in Figure 3.22.
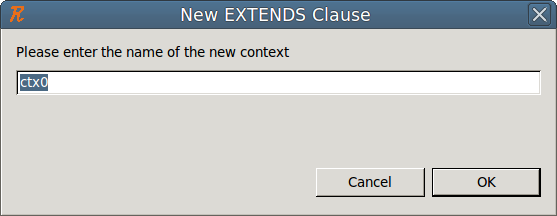
You can then enter the name of the new context which will automatically extend your chosen context.
3.1.4.9 Dependencies (Machine)
The Dependencies tab for machines is very similar to the one for contexts that is described in the previous section. The main difference is that there are two kinds of dependencies that can be established: machines on which the current machine depends are listed in the upper part and contexts on which the current machine depends are listed in the lower part.
3.1.4.10 Synthesis (Context)
Selecting the Synthesis tab brings up a global view of your context’s elements (carrier set / constant / axiom / extended context) as demonstrated in Figure 3.23.
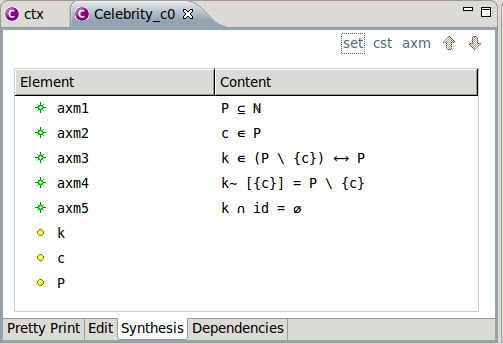
By pressing the set, cst, or axm buttons in the upper right corner, you can filter out the carrier sets, constants or axioms of your context respectively.
If you select an element, you can change its priority by pressing the
button or the
button. You do this for axioms, carrier sets, constants and extended contexts.
Right clicking in this view will bring up a contextual menu that allows you to add a new carrier set, constant, axiom or extended context.
3.1.4.11 Synthesis (Machine)
The Synthesis tab for machines is very similar to the one of contexts (see above) except that you have a global view of your machine’s elements (refined machine/seen context/variable/invariant/event/variant).
3.1.4.12 Pretty Print
Selecting the Pretty Print tab gives you a global view of your context or machine as if it had been entered through with an input text file as seen in Figure 3.24.